Microphone Mount
24 Feb 2020With the puppy arriving I wanted to do more videos in general, and after watching stuff on Skillshare I ended up buying some stuff to make things easier, more on that another time.
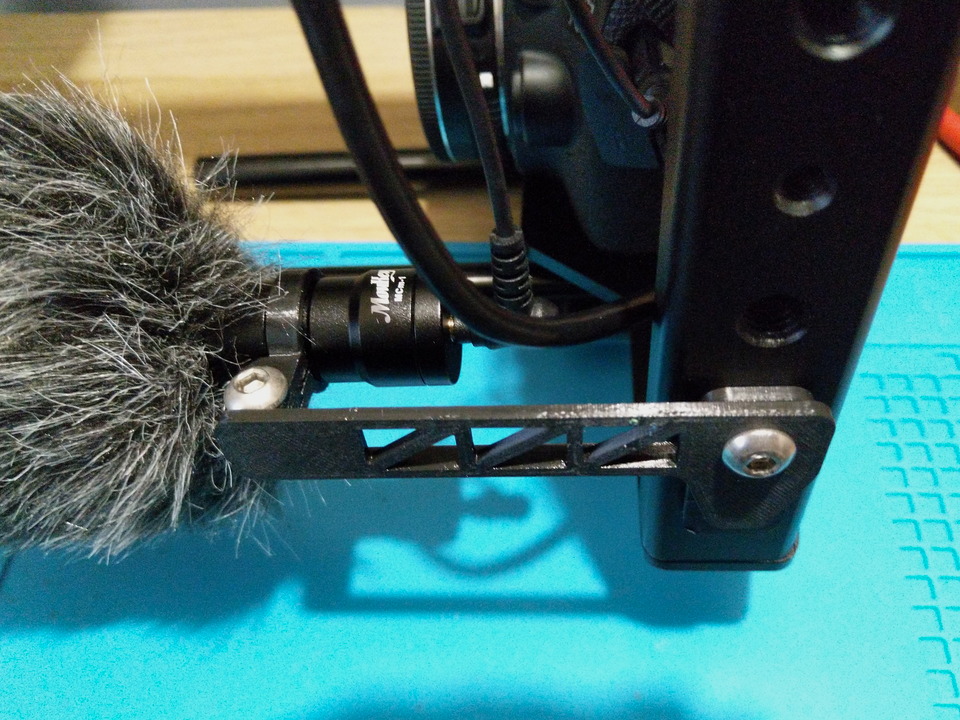
However I needed a way of attaching the external mic to the cage I brought, and the plastic mount it came with wasn’t going to work. Luckily I have a 3D printer :) .
After a little experimenting in Fusion 360 I came up with this:
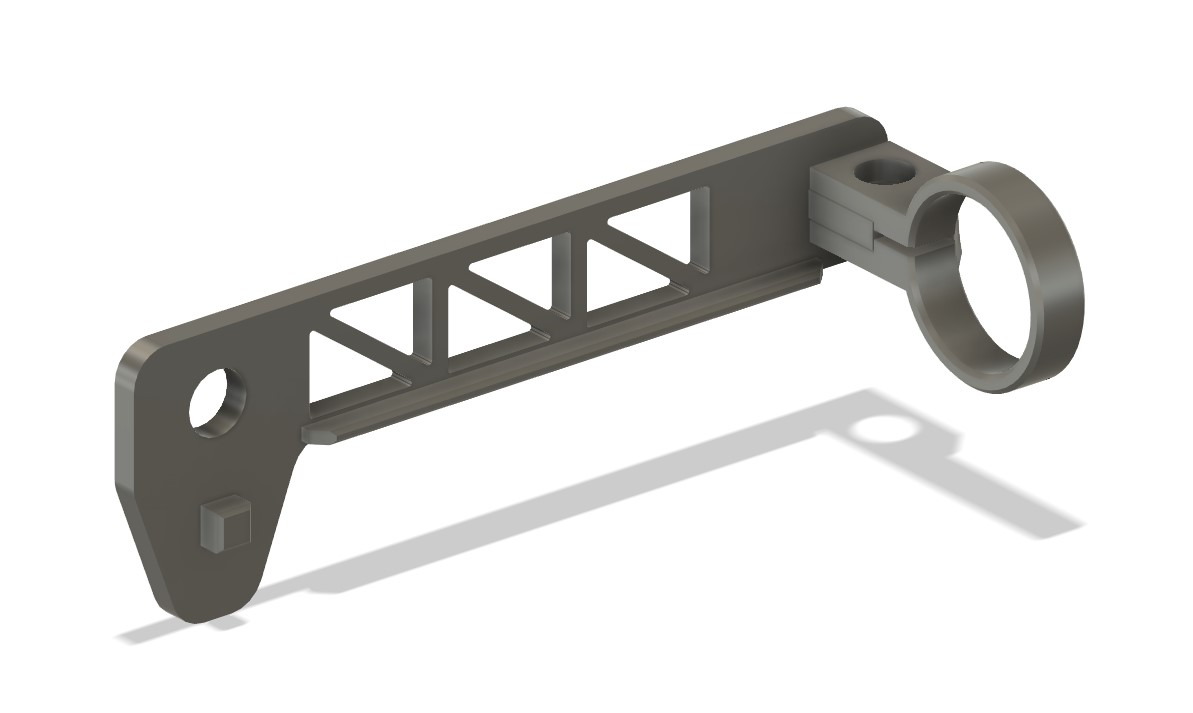
I decided to separate it into a mounting plate, that I could fiddle about for a good fit, and the arm that attaches to it. This also means that if there’s anything else I want to attach to the cage, rather then having to get the mouting correct I can just build something that attaches to this.
The hole round hole is for the 1/4" USC 20 bolt to go through, the peg is to lock into the 5/8" hole next to it. The square peg is for whatever is being attached to lock into so, combined with the bolt, it won’t rotate.

This is holder for the mic. It always amazes me how much PLA can flex, as this opens up to allow the mic through (it has a 18mm diameter body).-
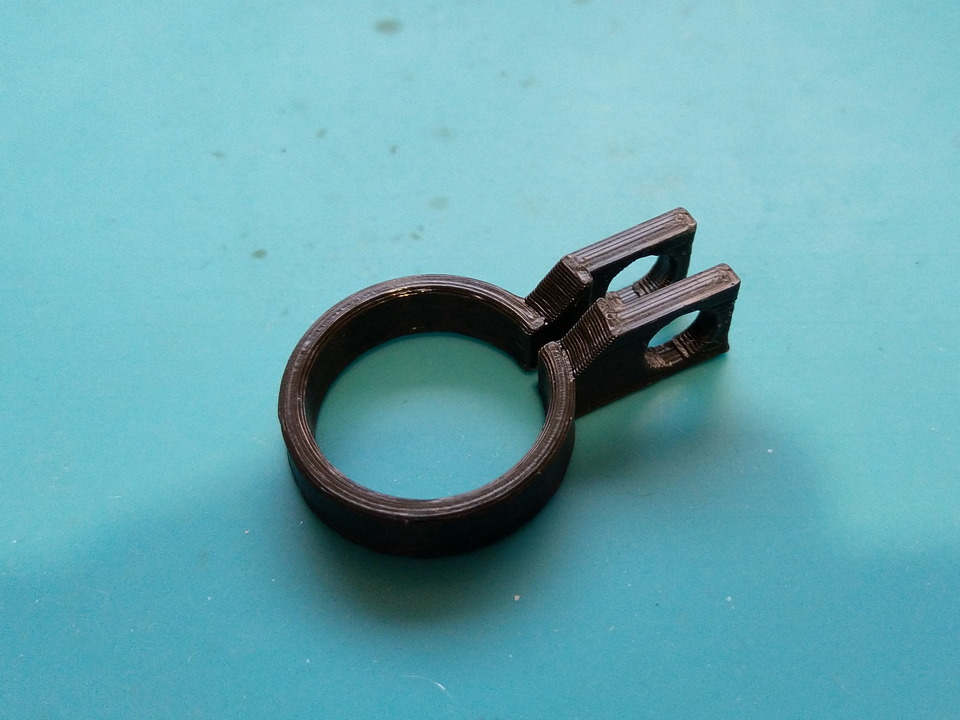
There were a few revisions of this, another reason I like building things in bits, to get the right fit (mostly decreasing the internal diameter and reducing the thickness so it could be flexed open).
The first arm design worked, but was quite bendy, so I added the shelf at the bottom to make it stiffer.
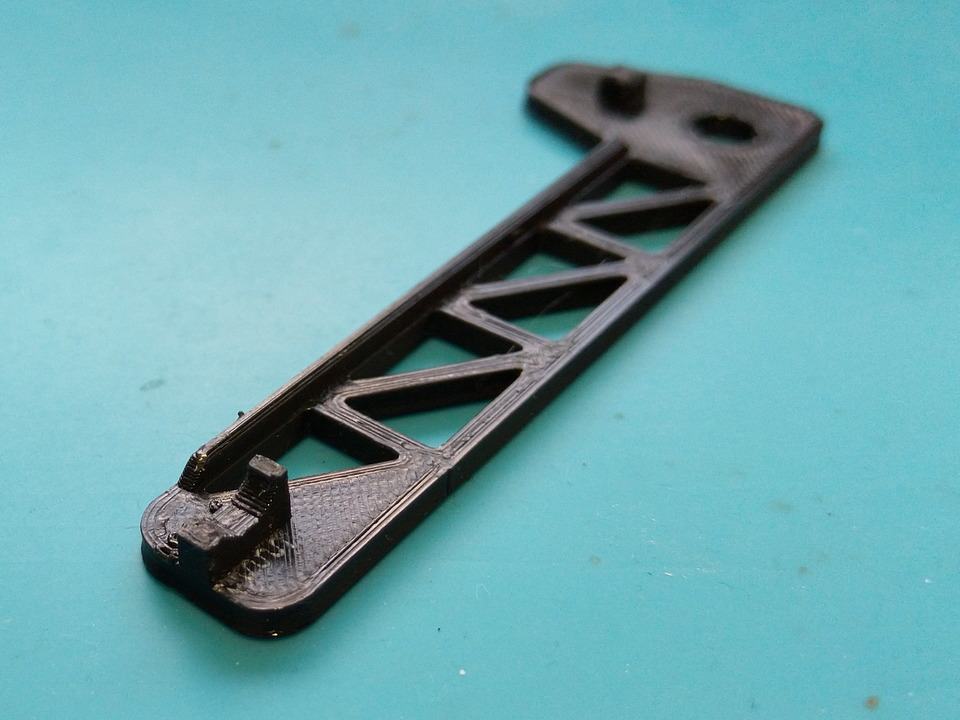
This was the result from trying to assemble this arm for the first time. When the nut was tightened it caught on the shelf and tried to stretch the joint apart, breaking it.
So I made the shelf shorter and the joint thicker to prevent this from happening again.
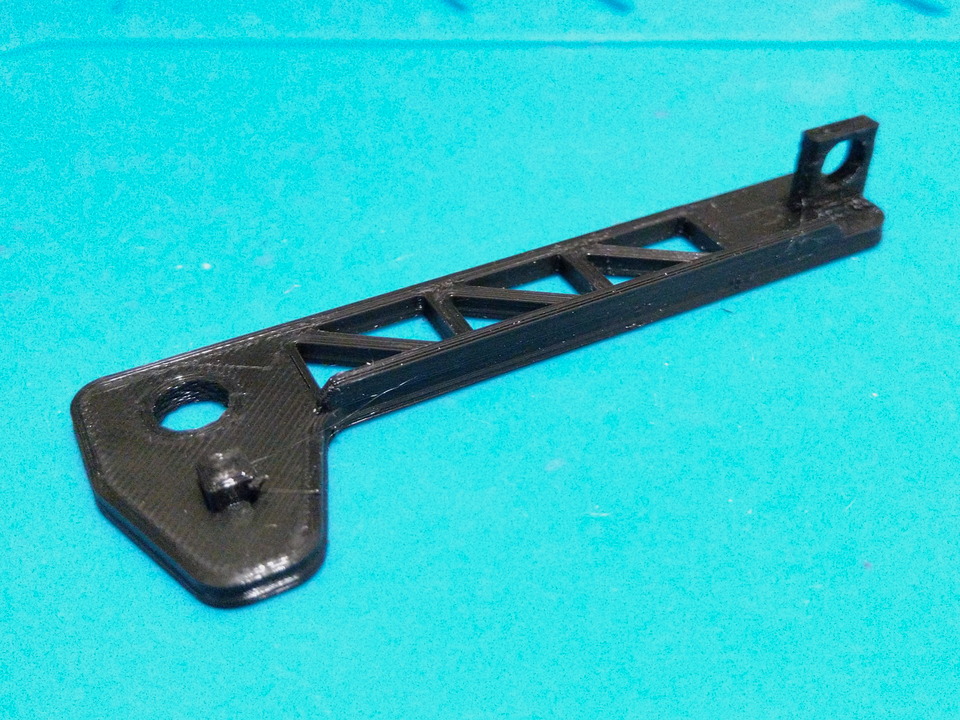
This is the final, for now, design of the arm. It’s still got a little flex, but much less then the first version.