MIDI Guerrilla : Real version
29 Mar 2017This week’s post is the building of the final version of the prototype I made in last weeks post.
Building the frame
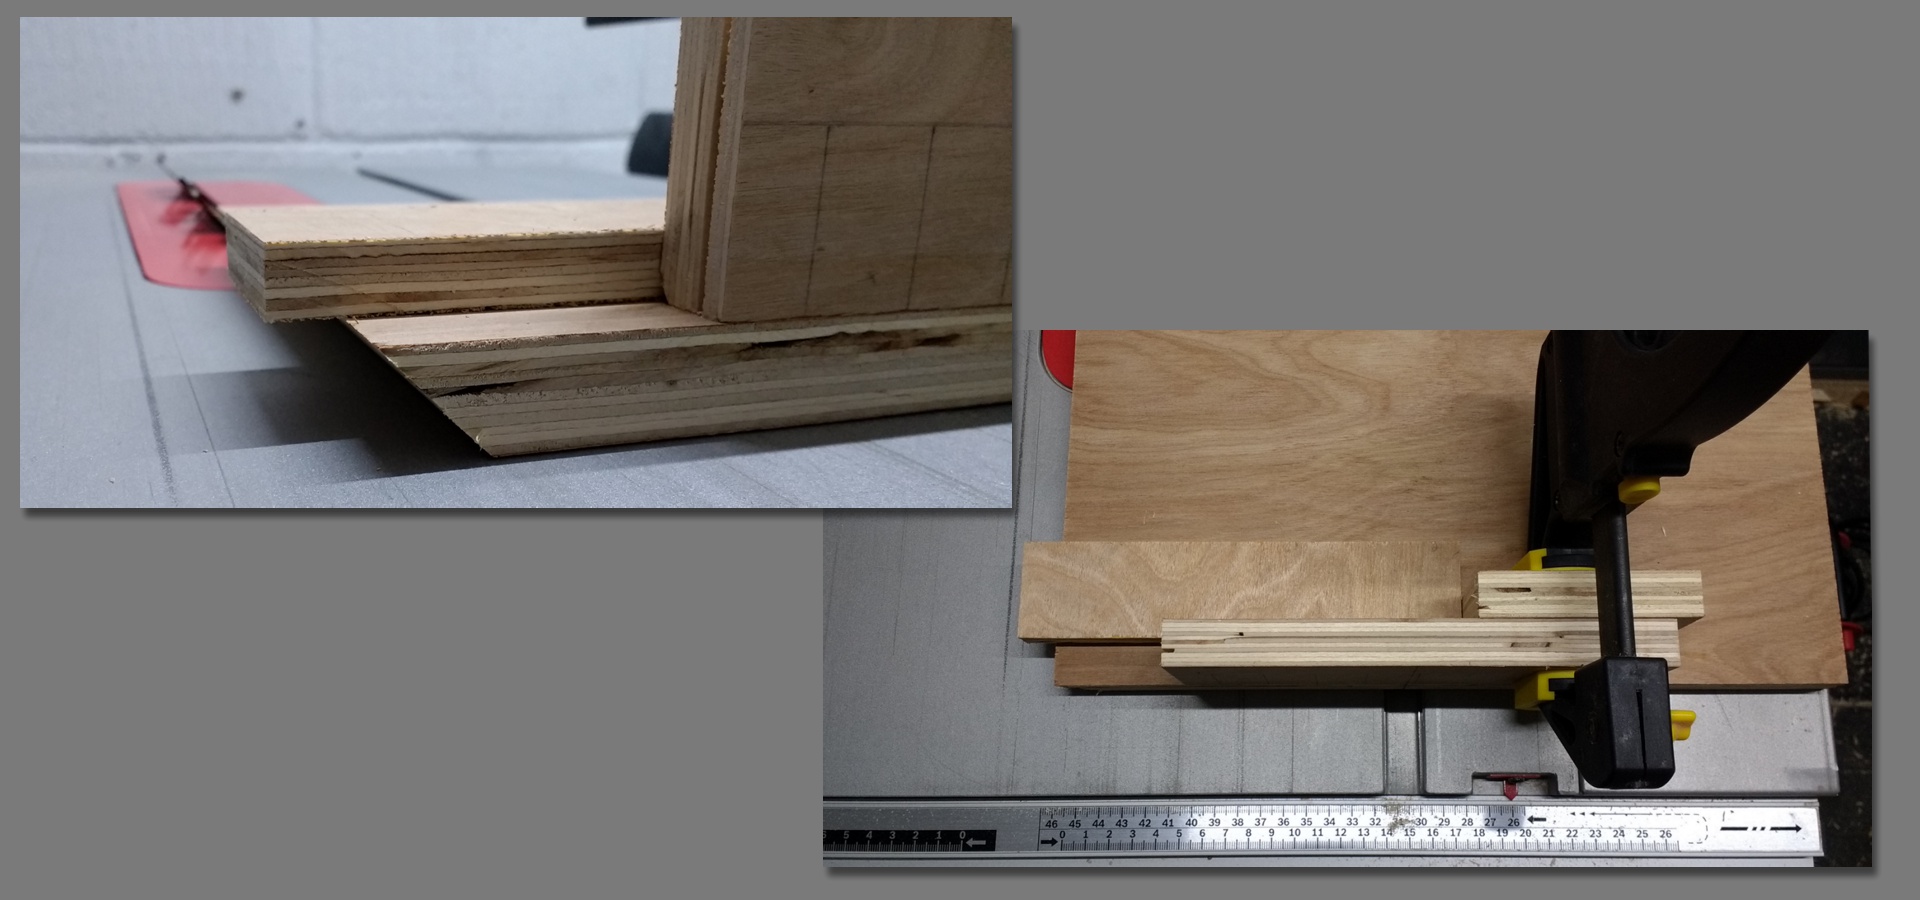
As generally happens when I start on a project, I always end up building a new tool. This time it was a smaller cross-cutting sled so I could cut the mitres easily while ensuring they were all the same length. The stop on the sled just means you don’t have to carefully position each piece after you’ve cut the first correctly (assuming all the bits are the same length to start with).
Making the top
This is pretty much a repeat of the process that I used in the last post with a few changes.
With the prototype I cut the larger recess first then cut the hole all the way though. While this worked I thought that cutting the hole first made it easier to measure the thickness of the rabbet and gave less for the larger bit to chew out.
The second change was to rotate the wood while I was drilling the pilot holes to help counter out any slant on the drill, as they’re not usually perfectly vertical. Comparing the two the newer ones holes are more central then the prototype so I’d say it worked.
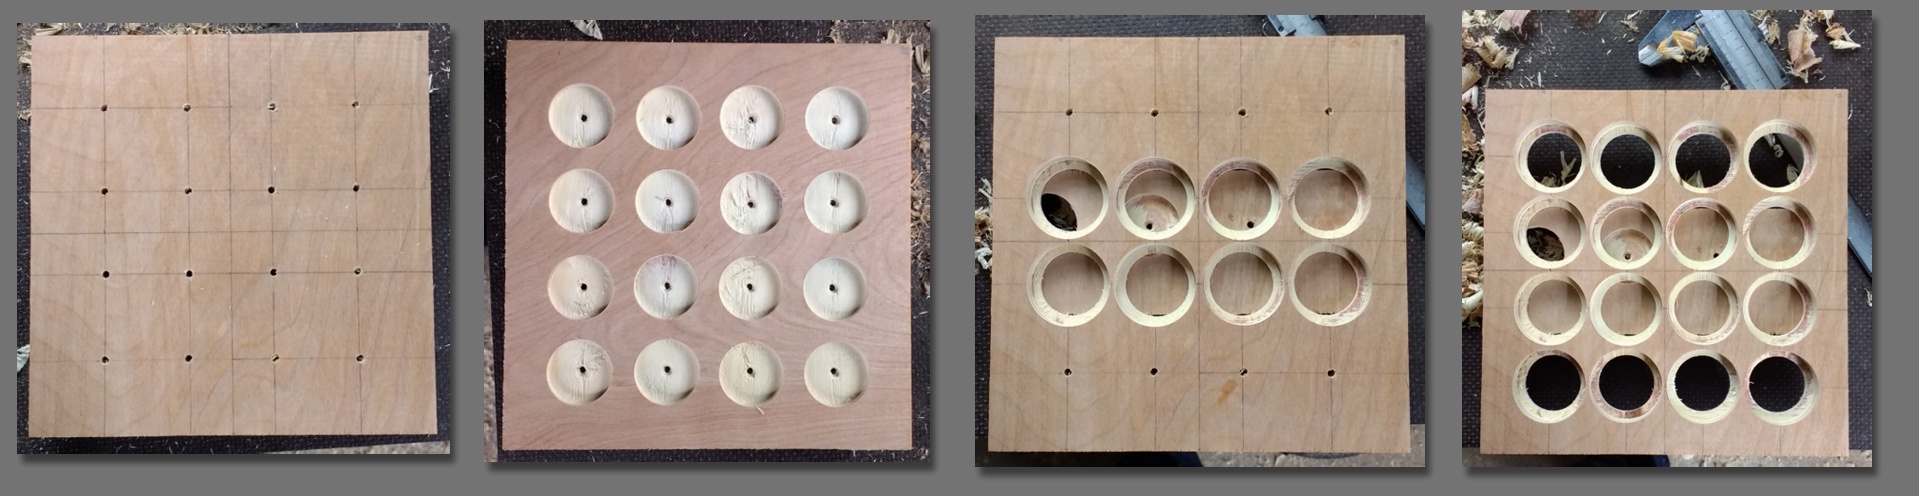
Once all the holes had been cut I used the sled to cut the angles on the top. I thought it was better to cut the holes first as I thought there might be a risk of tear-out if I did it the other way around. In the end I don’t think this was necessary, but it didn’t make anything harder to do it this way around.
Putting it together
The frame was stuck together in parts, two at a time to make the job easier.
Once the frame was finished I stuck the top on. Nothing complicated in other words.
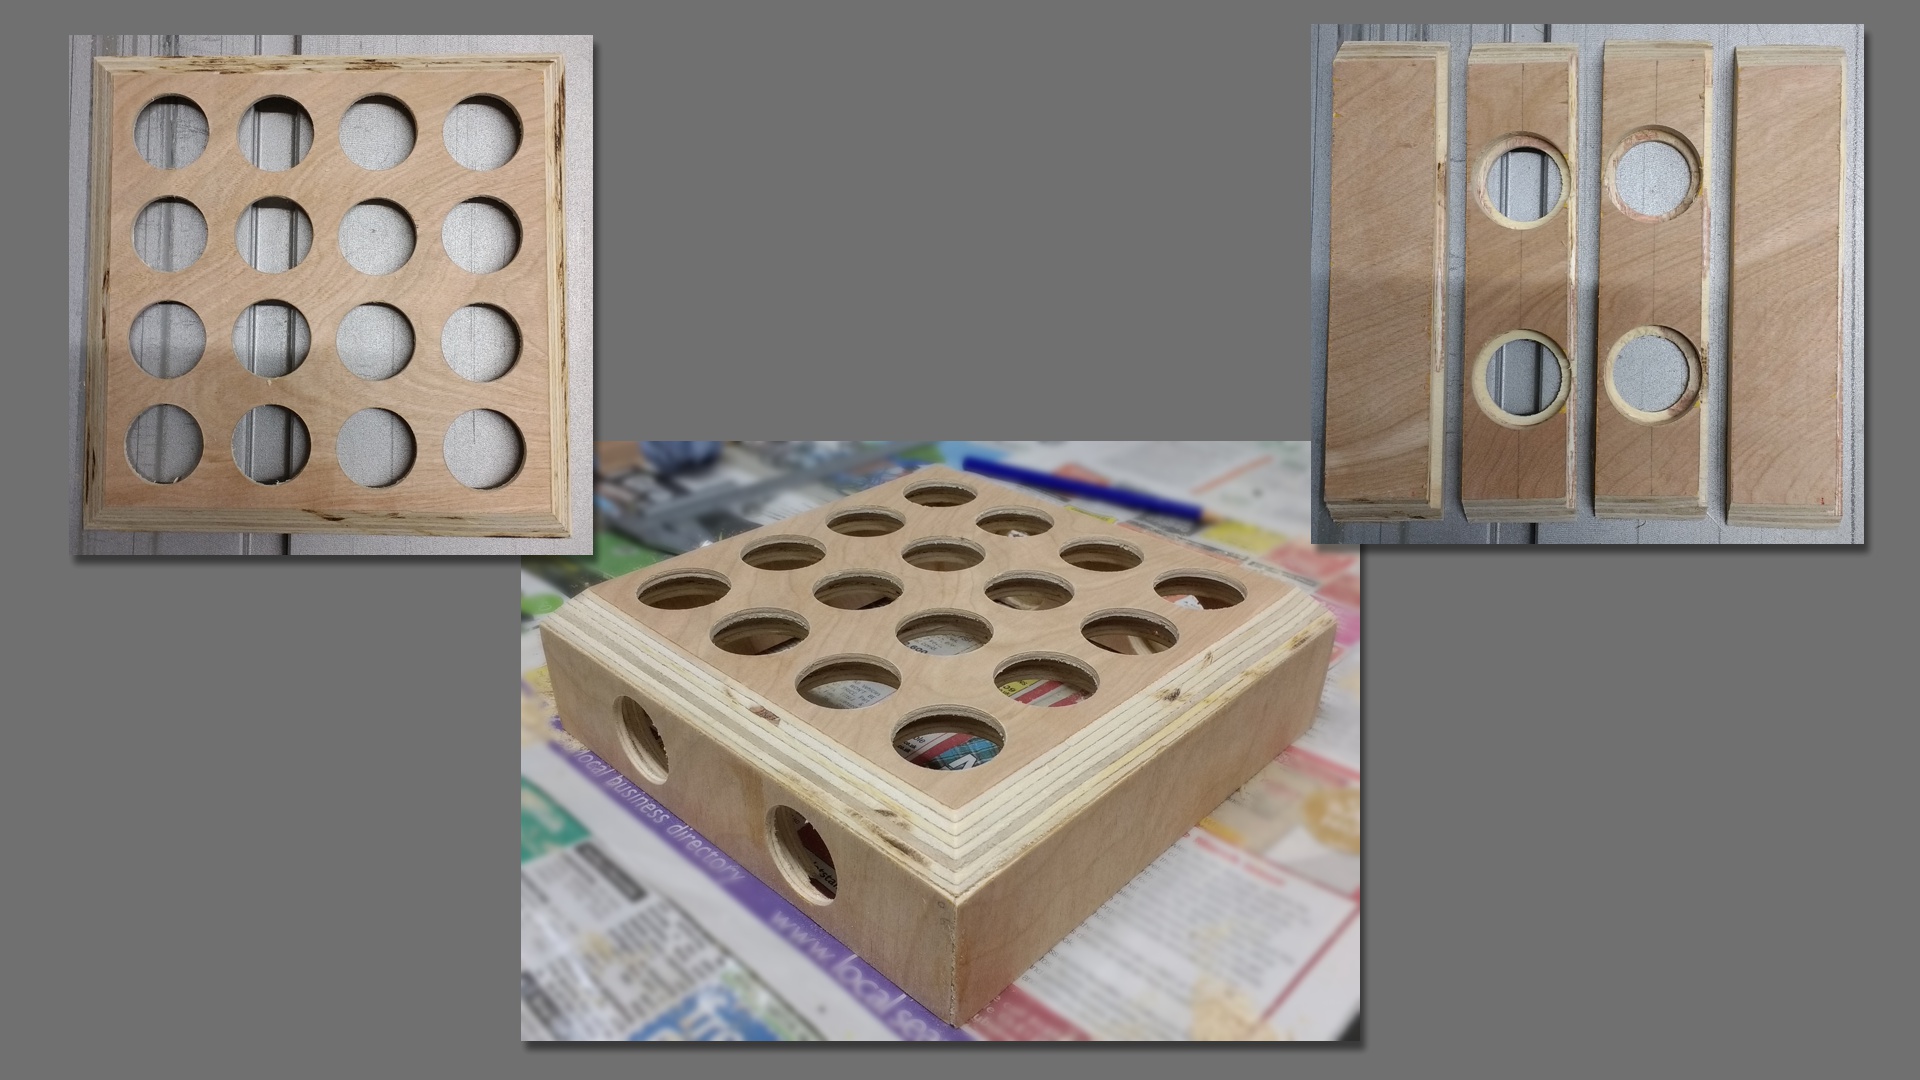
After that it just needed a bit of sanding and a few coats of varnish with sanding in-between to ensure a nice smooth finish.
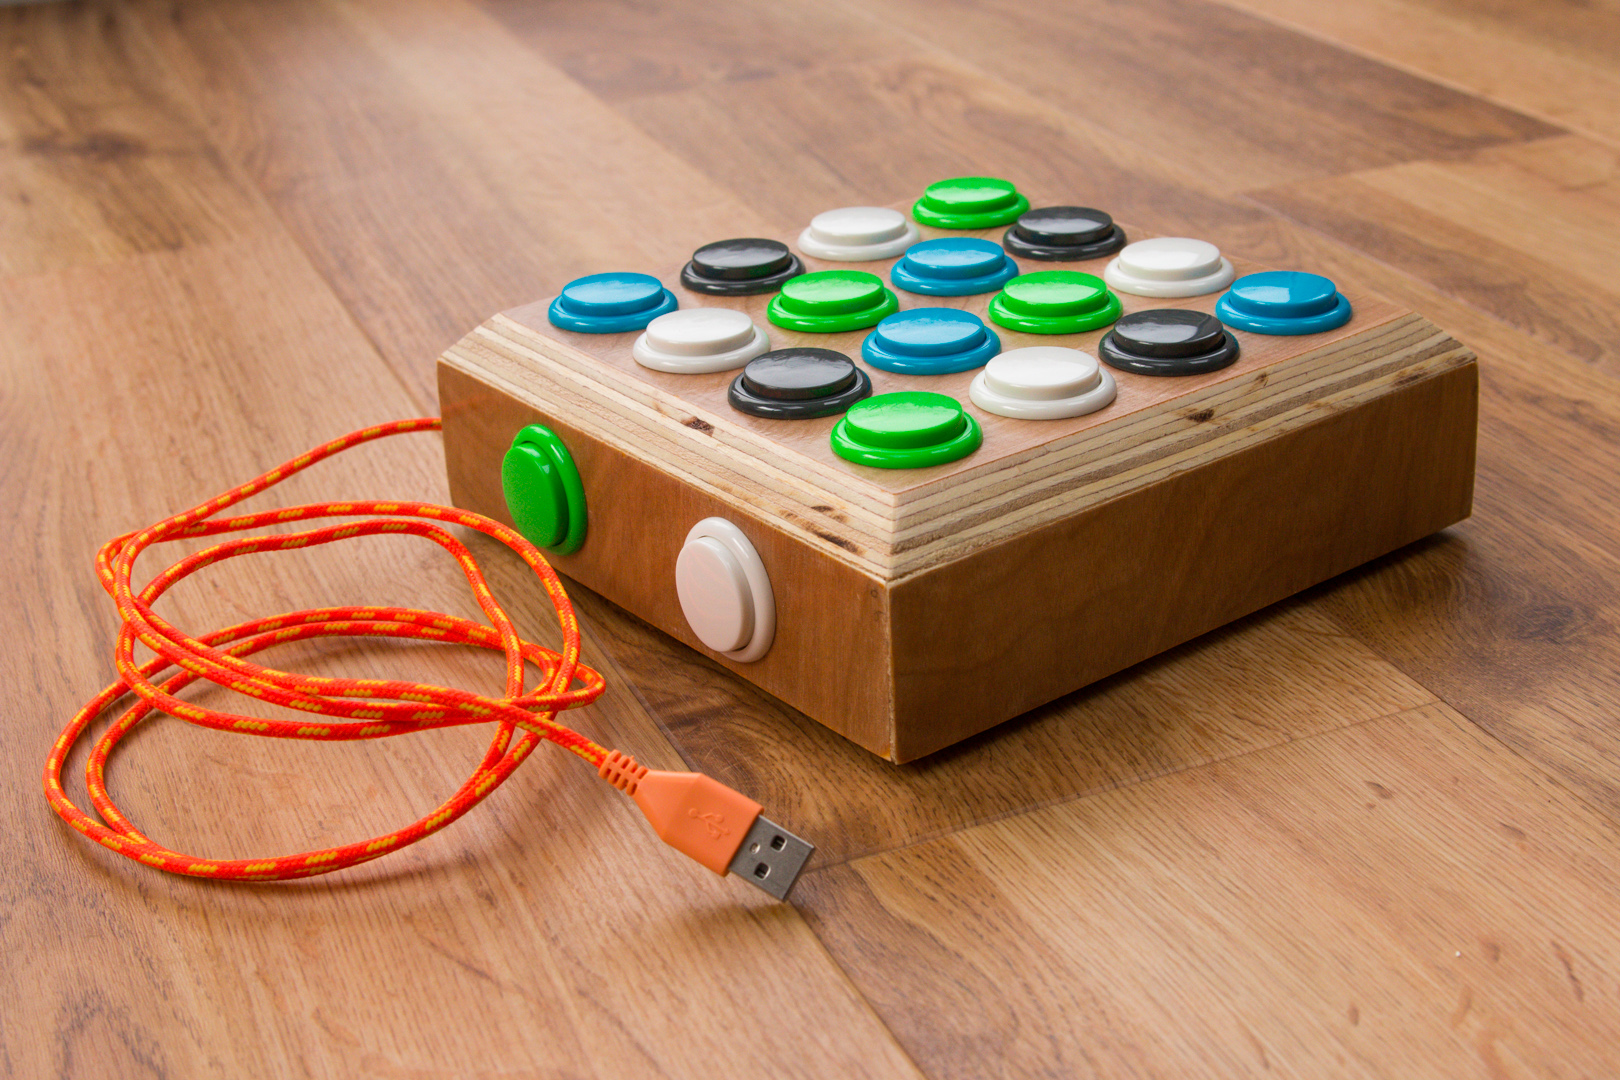
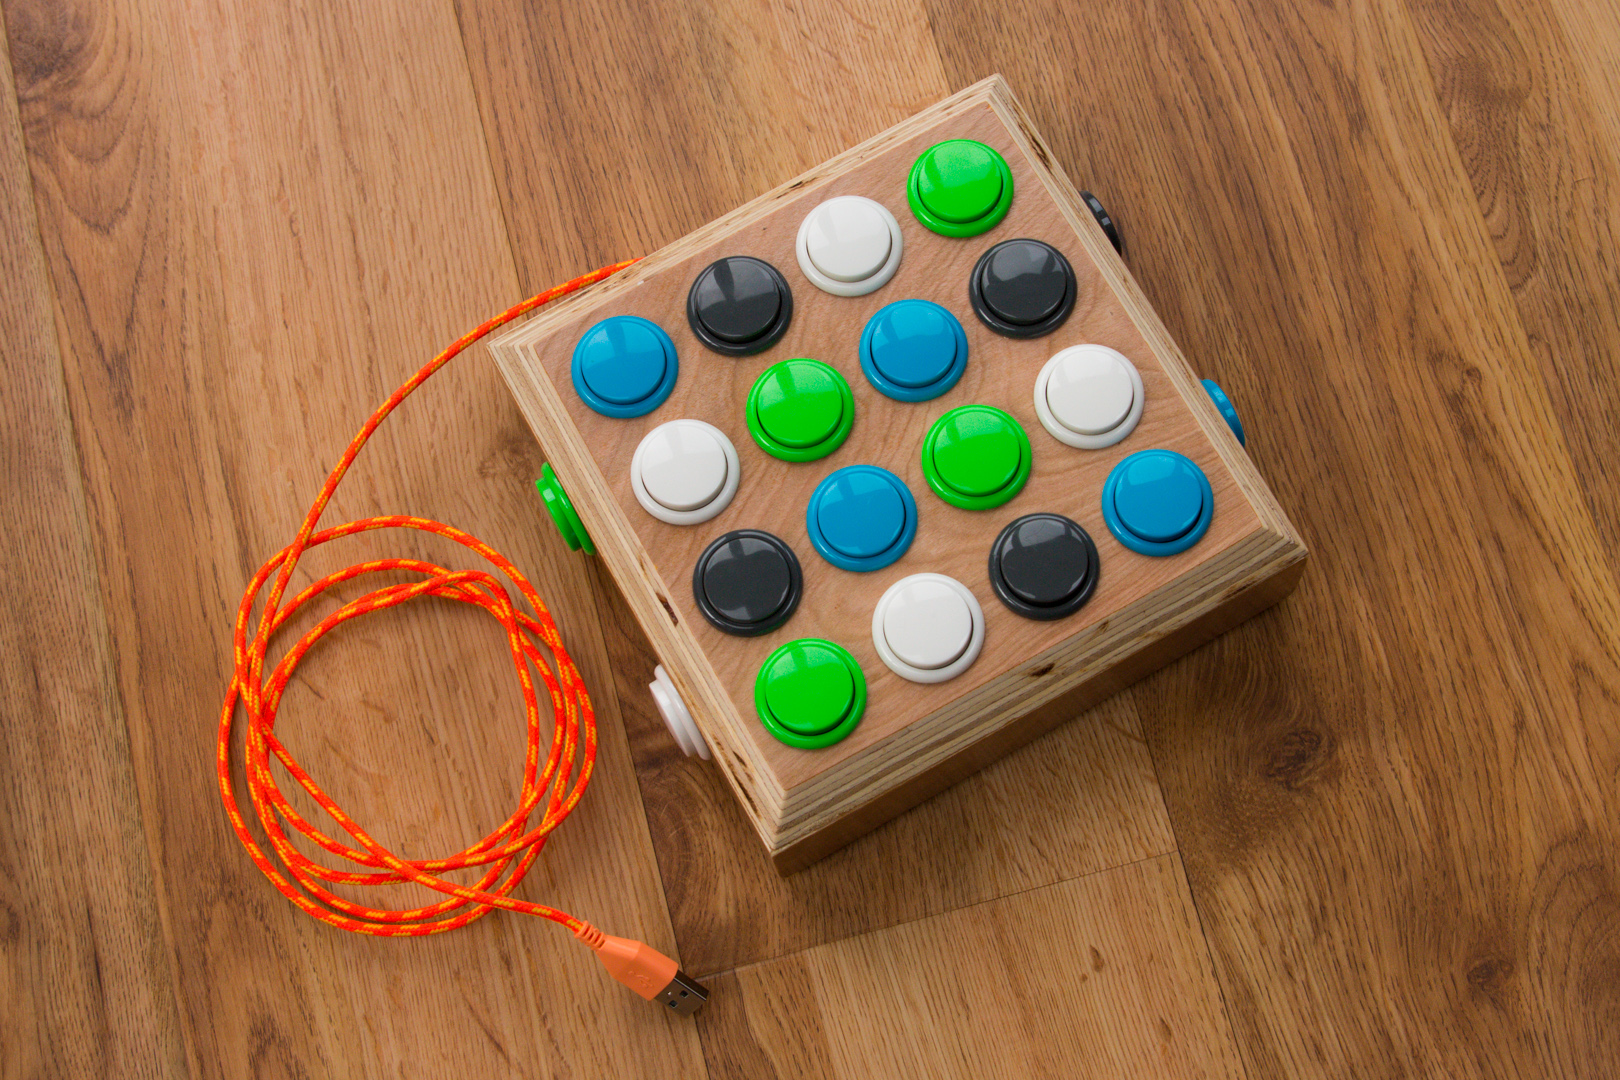
Adding the buttons
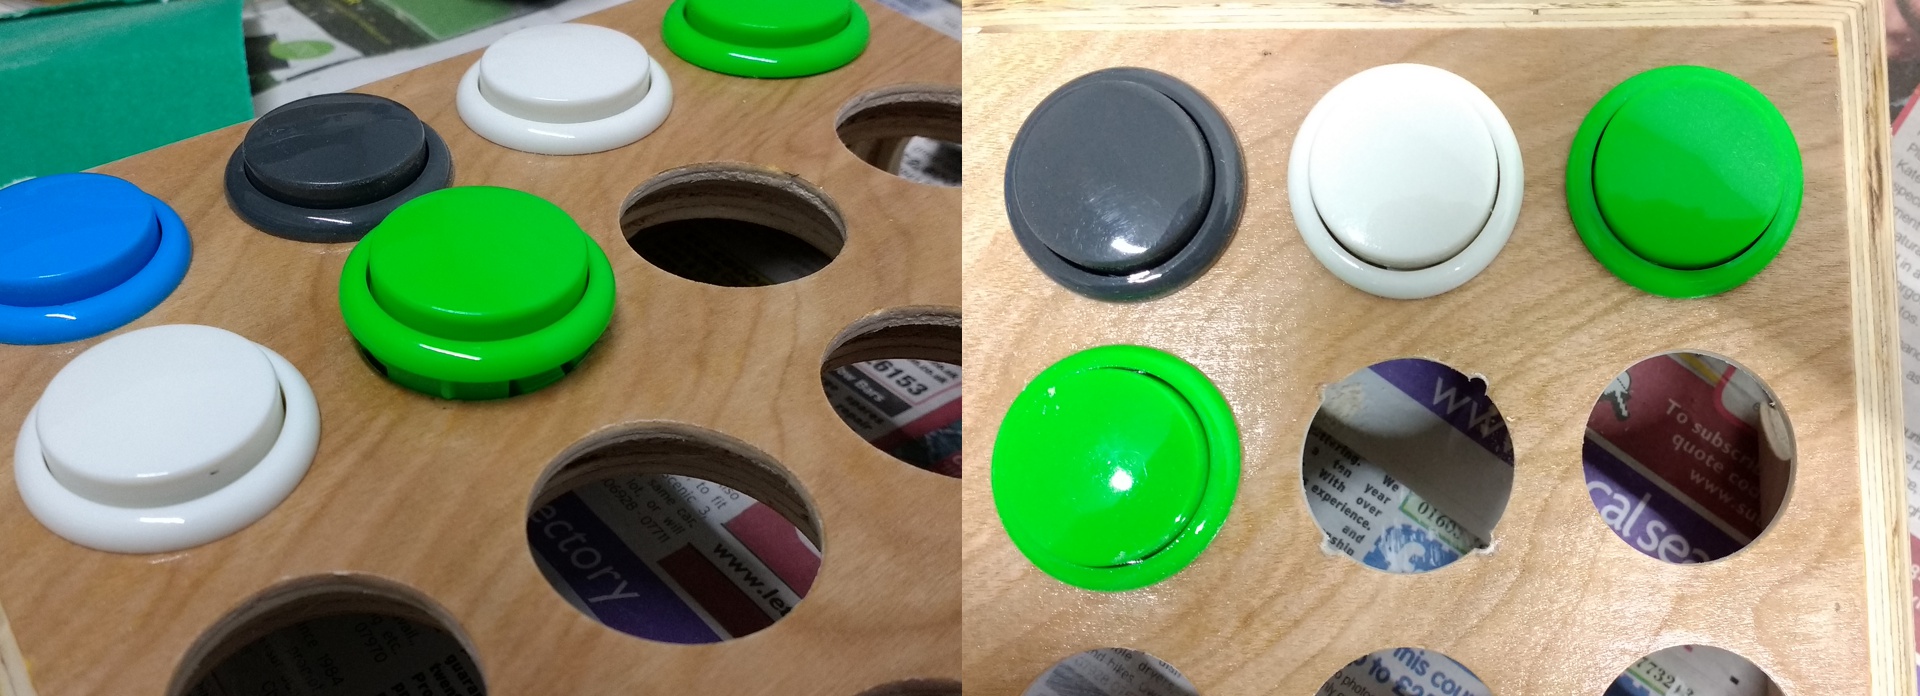
The buttons took a while to install as each hole needed a little adjustment. Each hole needed a quick sanding to remove any varnish that had gone inside and to make the hole a little bigger to make getting the buttons in easier.
The next adjustment was for the tabs on the buttons, which stop them from spinning around. These wouldn’t be a problem if you were pushing them into particle board, which seems to be what most arcade cabinets are made from, but with plywood there’s more chance of it just tearing out the bottom layer. To prevent this I used a round file to cut slots to go around the tabs.
Bank indicator
As there’s only 16 buttons, and you might want more samples then this, you need a way of switching to other banks. The original has four button along the top edge, but I didn’t really want them there as it would mean getting a second set of thinner buttons. Since I had four spare 30mm buttons I decided to stick them on the sides instead.
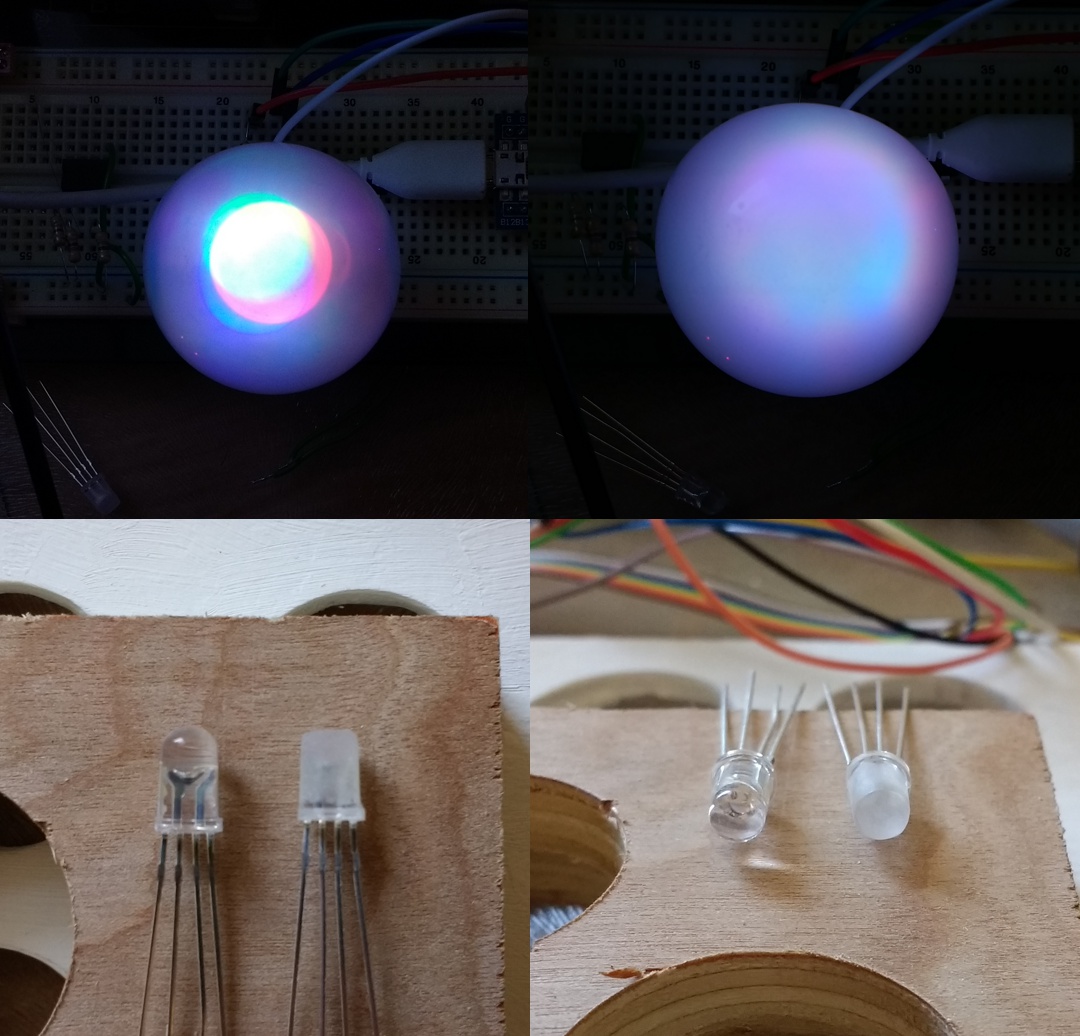
Now all I needed was a way to know which bank I had selected. Using a RGB LED made the most sense, but after a quick test I found that the colors didn’t mix too well. I've seen people sand LEDs I thought I’d give it a try. A few minutes with a bit of 240 git sandpaper and I had something that had a flat top and a in-built diffuser.
The pictures show it with the cover from an led bulb over the top to show the difference better on the camera. While you could see the points of light before with your eyes the camera didn’t like the brightness and the image just got swamped out.
Wiring and connecting up
This part was never going to be quick so I just had to get on with it. There’s not much to say about this really, just lots of soldering.
The extra wires on the right hand side of the final image are the programming interface as I was still tweaking the software when I took this picture.

It’s done
I've got a green USB cable coming, but the orange one will do for now.
Mistakes and improvements
- I thought that I might get away without any debouncing on the switches, but I quickly found out that wasn’t going to be the case. Some switches seemed to trigger cleanly, but others had some switching noise to I just debounced the whole lot.
- I need to be a lot more careful with where I put pencil marks when I’m using plywood as you can’t sand them off as easily.